![]()
Featuring: Bevel Alpha, omino kaleidoscope, and animated paths.
Sounds like the USA has had a heck of a Christmas weather run! Folks taking their vacations on airport waiting benches, and so forth. In particular, Seattle, home to After Effects. Where I am, it’s 7:33 pm, and I’ve just returned, sweating, from a nice bowl of Mun Eefoo Mee. Total google hits for that dish: 0, but the chef told me it’s his specialty, and it was delicious. Cost, with a cup of iced sweetened barley, 5 Ringitts Malaysian. Current temperature: 80F. Current exchange rate: 3.8 Ringitts to the US Dollar.
It’s my kind of place. “Christmas” is a national holiday, but nobody celebrates beyond a few santas at the mall. On the 25th, the shoe stores and the hardware stores were all open. As were thankfully the restaurants; I’m expated here alone for a few months, no home cooking for this coder.
So, in a fit of boundless atheism, I spent the 25th cobbling together an After Effects project to grow snowflakes!
Step 0: Research
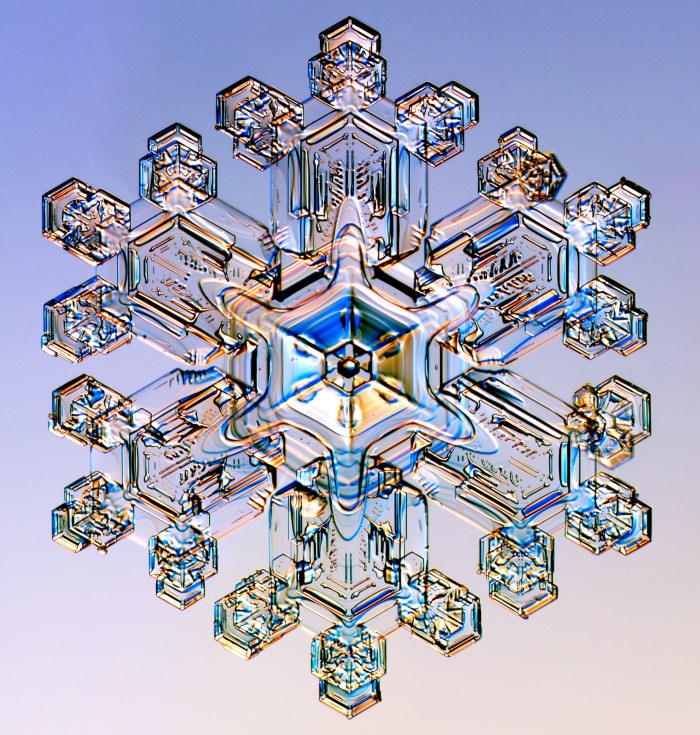
I found this great site, http://snowcrystals.com/ maintained by Kenneth G. Libbrecht, a Caltech physics professor. Fabulous stuff, including movies of lab-grown snow crystals!
After reading his site, and other sources, and general pondering, I jumped in with the scripting. It’s only a 2 day project, so it’s not really going to accurately mimic the physics of snow… but we’ll settle for “suggestive” and “cool-looking”.
(And, here is a short article about snowflake symmetry.)
Step 1: Growth
This movie shows one branch of a snowflake being “grown”. It’s a layer mask path, animated by ridiculous please-don’t-read-the-code script I wrote… but, truth to tell, you could animate almost anything in there, and, by the end, it’s going to look pretty snow-ish. You can download my script if you like. It’s kinda tweaky; the main trick is that the lengths parameter consists of letters, where a is a very short spike, and z is full length.
Step 2: Hexagonal Symmetry
We all know how to make a paper snowflake, with three or four folds and some scissors. We’ll do the same thing with my plugin, omino kaleidoscope, downloadable here.
(You can also use CC Kaleida, which is included with AE these days, to make an 8-fold snowflake. But use mine for authentic regulation 6-way symmetry.)
The omino kaleidoscope works by using an AE layer’s Mask Path to represent the shape of the mirrors. Any path will work (though curves are treated as straight segments). For snowflake symmetry, we need a wedge which is one twelfth of the pie. Again, I wrote a script, wedgePath to do this. But you could draw the mask manually, if you’re careful. (Be sure to set its mode to “none”, we don’t want it to clip the image.)
And set up omino kaleidoscope as shown in the screenshot above.
Step 3: Moreness
So far so good. Next, let’s add a few more layers of animated paths. We’ll superimpose them to get different gray-levels. Some of them are time-shifted, to evolve at different rates. Different transfer-modes can liven this up a little. Again: you can animate almost anything, and the kaleidoscope will make it snowflake-like.
Step 4: Imperfect
![]()
To make it look just a shade less mechanical, we can have the snowflake grow a little bit irregularly. Now, it is supposed to be a crystal, so we’ll go gently with this. Real snowflakes often show subtle imperfections like this, presumably due to environmental variations during formation.
The above frame is from Step 3, with Time Displaclement applied. Here’s the layer used as the Time Displacement Map. It ranges from black to 50% grey, ensuring that only negative time displacements will be used.
Note. Time Displacement is a render-time hog, since AE needs to render many frames past and present for each final frame. It’s helpful to disable this effect while tinkering, turn it back on for the render.
Step 5: Crystallize
This is the last step, really. We’ll use a few applications of Channel Mapper to convert luma to alpha. And then, this is the exciting part, we use Bevel Alpha with several colored lights to get the colorful crystalline look.
The “light angle” for the bevel effect has been animated with an expression
effect("Bevel Alpha")("Light Angle") + time * 90
just to keep it lively.
Also, Channel Mapper has been used to pull a dark grey in for the snowflake’s color. The different brightnesses earlier were mapped to alpha, for the beveling; the final result looks better with colors darker than white.
And I’m not above adding a bit of Find Edges and Glow, no sir. The secret sauce is ketchup. Whatever it takes!
Here’s the final result:
As ever, here’s the After Effects project. It doesn’t require any assets (the finalMovie comp references the photo and music loops, but pay it no mind).
download snowflakeSteps.aep
And so far, it has not been a cold day in Penang, Malaysia.

