picture home | art | events | music | rack extensions | downloads | pixel blog

omino pixel blog

pixels, motion, and scripting
david van brink // Sat 2009.03.14 14:20 // {after effects pixel bender}

AE CS4: Pixel Bender Quick Notes

Here are some super short notes about using Pixel Bender inside of After Effects CS4. This post is just another dicing of the available info culled from the After Effects help, and the Pixel Bender Developer Guide.

But it’s the stuff that I most needed to get started, as well as a handy copy-and-paste source for the parameter control types.

This is about Pixel Bender in After Effects specifically.

Installing

Let’s start at the end. To use a Pixel Bender kernel in After Effects, just drop it in the Plug-Ins folder.

  • By default, it shows up in the Pixel Bender effects category.
  • It won’t show up until the next time you start After Effects
  • If it has any syntax errors, AE will warn you as it starts up, and reject the kernel.
  • Any changes to the kernel won’t show up until you quit and re-run After Effects. (Purge-all doesn’t seem to reload it…)
  • (And you can put it in a subfolder of Plug-Ins, of course, to keep things organized.)

Authoring

Source Image To work with After Effects, near as I can tell, it must take at least one image4 source. Even if the kernel is a pure generator, it needs to take an image input.

Multiple Source Images If the kernel takes more than one source image, the additional sources can be chosen in AE by a layer control. (Grand!)

Control Types By default, all parameters show up as sliders. But you can request a different control in the parameter description.

Example

Here’s an example of a Pixel Bender kernel that just generates a solid color. It has several parameter controls on it of the different supported types, and accepts a second layer as input. These are all ignored! But we can see how the controls are displayed, which is handy.

Here’s a screen capture, with the About box. (Trivial bug, the display name isn’t used in the About box…)

pbSolidColor.png

And here’s the code for the kernel, showing the various descriptors.

<languageVersion : 1.0;>

kernel solid_color
<namespace : "omino"; 
 vendor : "Omino PixelBlog 2009"; 
 version : 2; 
 description : "Generates a solid color.";
 displayname: "Solid Color";
 category: "omino"; >
{
 input image4 src;
 input image4 src2;
 output pixel4 dst;

 parameter float4 color 
  <defaultValue: float4(1,0,0,1); 
   aeDisplayName: "Color"; 
   aeUIControl: "aeColor";>;

 parameter float angle 
  <defaultValue: 45.0; 
   aeDisplayName: "Angle"; 
   aeUIControl: "aeAngle";>;

 parameter float2 point 
  <aePointRelativeDefaultValue: float2(0.5,0.5);
   aeDisplayName: "Point";
   aeUIControl: "aePoint";>;

 parameter int popup 
  <defaultValue: 3; 
   aePopupString:"Zero|One|Two|Three|Four"; 
   aeDisplayName: "Popup"; 
   aeUIControl: "aePopup";>;

    void evaluatePixel()
    {
        dst = color;
    }
}

Onward

With this amount of flexibility, and the instant cross-platform nature of Pixel Bender kernels, the barriers to entry for effects development have been dropped to almost nothing. Great stuff!

oh, i dont know. what do you think?


david van brink // Fri 2009.03.13 22:15 // {after effects}

After Effects CS4: Ultrabrief First Impressions

Joy!

I finally have returned from several months away, back into the usual routine. My fresh copy of After Effects CS4 was waiting! (Thanks so much, you know who you are!)

Verrrry brief first impressions.

Darker, Darker

I love how each successive version is a bit darker, more mysterious looking. It’s just like Luke Skywalker, remember how in the first movie he’s wearing something like a beige judo gi, and by Jedi he’s all in black and getting rather professional? AE is following the same sequence here.

But seriously, I like it.

(How long til UI-fashion flips back around to rose-petal-white and no visible edges? Maybe when e-paper starts to be the dominant output format. Bring on the new colors for 2020. Tufte said it would be like this.)

Pixel Bender

It’s so simple, just drop your .pbk files into the Plug-Ins folder and they show up in the Effects & Presets list, in the Pixel Bender category. Love it. More to come on this topic.

Still, first impressions: need a way to influence the parameter control rendering in the UI, to get grouping, and point and color controls.

UPDATE Jeff at Redefinery corrects me again. Pixel Bender filters can define the control type for each parameter, like this (excerpted from the latest pixel bender online help):

parameter float blend_with_original
<
  minValue: 0.0;
  maxValue: 100.0;
  defaultValue: 0.0;
  description: "Amount to blend with original input"; //comment only, ignored in AE
  aeDisplayName: "Blend Factor"; //AE-specific metadata
  aeUIControl: "aePercentSlider"; //AE-specific metadata
>;

Legal values for aeUIControl include aeAngle, aePercentSlider, aePoint, aeColor, and a couple others.

Online Help

Hate it. I do know After Effects pretty well… but also, I do flip to the manual not infrequently. I don’t miss the paper manual, not one bit. But I don’t much care for where CS4’s “After Effects Help…” takes you, some catch-all page of community goodies. The community pages are great, and I’m happy when Google lands me up there.

I just want the table of contents. And CS3’s help viewer seemed tighter and snappier.

UPDATE I see this has been fixed in 9.0.1! Help takes you to the contents page.

A Mysterious ASIO Driver

I never saw this before… but Cubase is offering After Effects 9.0 as an available ASIO driver. I have no idea what this means… More research is needed! Possibly a side effect of being able to preview AE out to an ASIO sound card.

Some Tiny Stuff

Todd K at Adobe posted a pretty comprehensive list of CS3->CS4 changes at http://blogs.adobe.com/toddkopriva/2008/09/an_unordered_approximately_com.html. Many of them are small… but cumulatively it’s good stuff.

Here’s one that really, well, really does make a difference. If your view is scaled to 25%, then the resolution is automatically dropped by the same amount.

(You can imagine the deep philosophical discussions on whether that’s the right thing to do… “But when you scale back up, your cache is gone!” But, praise Darwin, these things have to be tried, and by God, we all of us irrevocably ascend towards perfection.)

Overall

So, overall, After Effects 9.0 aka CS4 seems to be an evolutionary step.

As a relatively light recreational user, many of the subtler workflow changes are outside my domain. I don’t have a render farm, nor major pipeline and multi-tool integration issues.

But on the Eye Candy side… I dare say we can still anticipate some startling Pixel Bender innovations over time, enabled by AE9.

5 comments
Todd Kopriva // Sat 2009.03.14 00:1312:13 am

We’re glad that you like it so far.

In case you missed it, I posted on my blog a nearly complete list of all of the new and changed features from After Effects CS3 to After Effects CS4:

http://blogs.adobe.com/toddkopriva/2008/09/an_unordered_approximately_com.html

david van brink // Sat 2009.03.14 07:357:35 am

Thanks Todd! I’ve updated the post a little (and rereading The List reminded me of one more tiny, but quite useful, CS4 feature).

Jeff Almasol // Sat 2009.03.14 10:5310:53 am

Pixel Bender parameters can be represented as point, color, angle, popup, and percent slider controls in AE using AE-specific parameter metadata; sorry, no grouping control at this time. You can also specify a custom effect name and effect category for your kernel or graph.

The expanded documentation available with the latest Adobe Labs release of the Pixel Bender Toolkit (at http://labs.adobe.com/downloads/pixelbender.html) has the details. Choose Help > Pixel Bender Developer Guide from within the toolkit, and check out the “Developing for After Effects” section.

david van brink // Sat 2009.03.14 12:4812:48 pm

Davros say: EXCelllennt. Thanks for the pointer. Rolled in a note to the entry about it. This is grand.

stefanobeck // Fri 2009.07.24 13:411:41 pm

Hi, i have my blog for aE tutorial in italian language and you blog is very interesting! Thx

oh, i dont know. what do you think?


david van brink // Sun 2009.01.11 02:00 // {after effects}

AE Feature Request (Dear Adobe)

Update: Dear Adobe — please acquire and incorporate ObviousFX’s Copy Image plugin as part of After Effects proper.

The plugin, available for Mac and Windows, adds an Edit menu item, Copy Image, which copies the current composition image to the clipboard.

Thanks, ObviousFX and thanks, Rich, for pointing it out for me. Great stuff.


Original post:

Hopefully, someone will point out that this is already in After Effects CS4. But I’m such a luddite that I haven’t upgraded or even played with AE CS4 yet.

Sometimes, I use After Effects as a really powerful drawing program, no animation. It works in a very… engineer-friendly way, for compositing. I like that I can concoct a tree of layers, and modifiers on those layers, and use expressions to “rig” them together.

Here’s my feature request:

Copy Frame, High Quality

It’s pretty simple. It would place the current frame of the current comp at either full resolution, or maybe current resolution, as a PNG with transparency(or whatever is appropriate, here in 2009), onto the clipboard, ready to be pasted into another drawing app (or an email or whatever).

I realize with modern graphics displays and screen grabs you can get pretty good pastes… but you’ll have to crop carefully, maybe rearrange the workspace to get it visible, &c. And there’s render-to-file, but what a bother.

So I’d like Copy Current Frame as a feature, please. Thanks!

2 comments
rich // Mon 2009.01.12 20:558:55 pm

ObviousFX has a filter:

Win – Copy Image (free)
http://www.obviousfx.com/products/copyimage/copyimage.php

rich // Mon 2009.01.12 20:578:57 pm

oh, yeah it would be better without a filter that might need upgrading…

oh, i dont know. what do you think?


david van brink // Sat 2008.12.27 10:05 // {after effects extendscript}

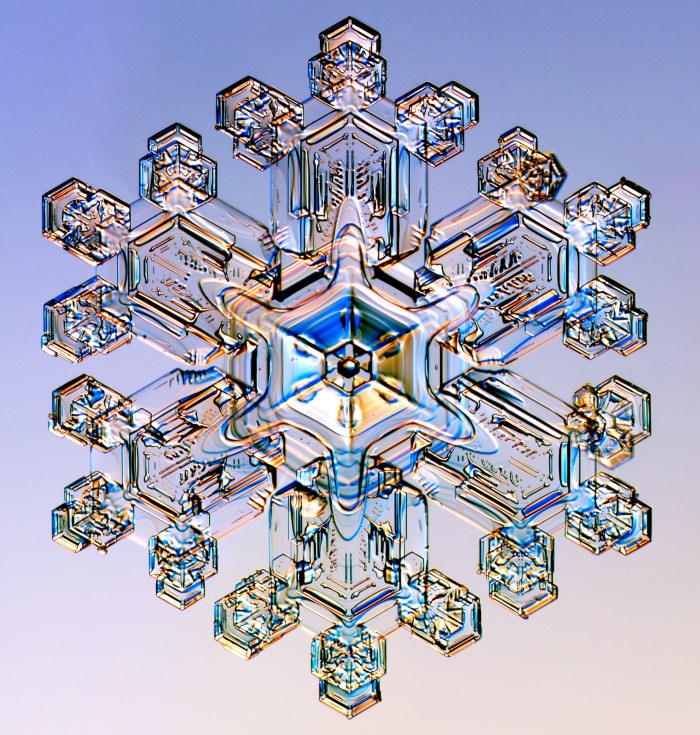
AE: A Snowflake

colorfulSnowflake.jpg

download snowflakeSteps.aep

Featuring: Bevel Alpha, omino kaleidoscope, and animated paths.

Sounds like the USA has had a heck of a Christmas weather run! Folks taking their vacations on airport waiting benches, and so forth. In particular, Seattle, home to After Effects. Where I am, it’s 7:33 pm, and I’ve just returned, sweating, from a nice bowl of Mun Eefoo Mee. Total google hits for that dish: 0, but the chef told me it’s his specialty, and it was delicious. Cost, with a cup of iced sweetened barley, 5 Ringitts Malaysian. Current temperature: 80F. Current exchange rate: 3.8 Ringitts to the US Dollar.

It’s my kind of place. “Christmas” is a national holiday, but nobody celebrates beyond a few santas at the mall. On the 25th, the shoe stores and the hardware stores were all open. As were thankfully the restaurants; I’m expated here alone for a few months, no home cooking for this coder.

So, in a fit of boundless atheism, I spent the 25th cobbling together an After Effects project to grow snowflakes!

Step 0: Research

I found this great site, http://snowcrystals.com/ maintained by Kenneth G. Libbrecht, a Caltech physics professor. Fabulous stuff, including movies of lab-grown snow crystals!

After reading his site, and other sources, and general pondering, I jumped in with the scripting. It’s only a 2 day project, so it’s not really going to accurately mimic the physics of snow… but we’ll settle for “suggestive” and “cool-looking”.

(And, here is a short article about snowflake symmetry.)

Step 1: Growth

This movie shows one branch of a snowflake being “grown”. It’s a layer mask path, animated by ridiculous please-don’t-read-the-code script I wrote… but, truth to tell, you could animate almost anything in there, and, by the end, it’s going to look pretty snow-ish. You can download my script if you like. It’s kinda tweaky; the main trick is that the lengths parameter consists of letters, where a is a very short spike, and z is full length.

Step 2: Hexagonal Symmetry

We all know how to make a paper snowflake, with three or four folds and some scissors. We’ll do the same thing with my plugin, omino kaleidoscope, downloadable here.

(You can also use CC Kaleida, which is included with AE these days, to make an 8-fold snowflake. But use mine for authentic regulation 6-way symmetry.)

The omino kaleidoscope works by using an AE layer’s Mask Path to represent the shape of the mirrors. Any path will work (though curves are treated as straight segments). For snowflake symmetry, we need a wedge which is one twelfth of the pie. Again, I wrote a script, wedgePath to do this. But you could draw the mask manually, if you’re careful. (Be sure to set its mode to “none”, we don’t want it to clip the image.)

And set up omino kaleidoscope as shown in the screenshot above.

Step 3: Moreness

So far so good. Next, let’s add a few more layers of animated paths. We’ll superimpose them to get different gray-levels. Some of them are time-shifted, to evolve at different rates. Different transfer-modes can liven this up a little. Again: you can animate almost anything, and the kaleidoscope will make it snowflake-like.

Step 4: Imperfect

step4_imperfect_frame.jpg

To make it look just a shade less mechanical, we can have the snowflake grow a little bit irregularly. Now, it is supposed to be a crystal, so we’ll go gently with this. Real snowflakes often show subtle imperfections like this, presumably due to environmental variations during formation.

The above frame is from Step 3, with Time Displaclement applied. Here’s the layer used as the Time Displacement Map. It ranges from black to 50% grey, ensuring that only negative time displacements will be used.

Note. Time Displacement is a render-time hog, since AE needs to render many frames past and present for each final frame. It’s helpful to disable this effect while tinkering, turn it back on for the render.

Step 5: Crystallize

This is the last step, really. We’ll use a few applications of Channel Mapper to convert luma to alpha. And then, this is the exciting part, we use Bevel Alpha with several colored lights to get the colorful crystalline look.

The “light angle” for the bevel effect has been animated with an expression

effect("Bevel Alpha")("Light Angle") + time * 90

just to keep it lively.

Also, Channel Mapper has been used to pull a dark grey in for the snowflake’s color. The different brightnesses earlier were mapped to alpha, for the beveling; the final result looks better with colors darker than white.

And I’m not above adding a bit of Find Edges and Glow, no sir. The secret sauce is ketchup. Whatever it takes!

Here’s the final result:

As ever, here’s the After Effects project. It doesn’t require any assets (the finalMovie comp references the photo and music loops, but pay it no mind).
download snowflakeSteps.aep

And so far, it has not been a cold day in Penang, Malaysia.

oh, i dont know. what do you think?


Deprecated: Function the_block_template_skip_link is deprecated since version 6.4.0! Use wp_enqueue_block_template_skip_link() instead. in /home/polyomino/omino.com/pixelblog/wp-includes/functions.php on line 6114

0.0328s
(c) 2003-2023 omino.com / contact poly@omino.com